Create a Plugin Page
To begin designing elements on your Plugin Page, follow these steps:
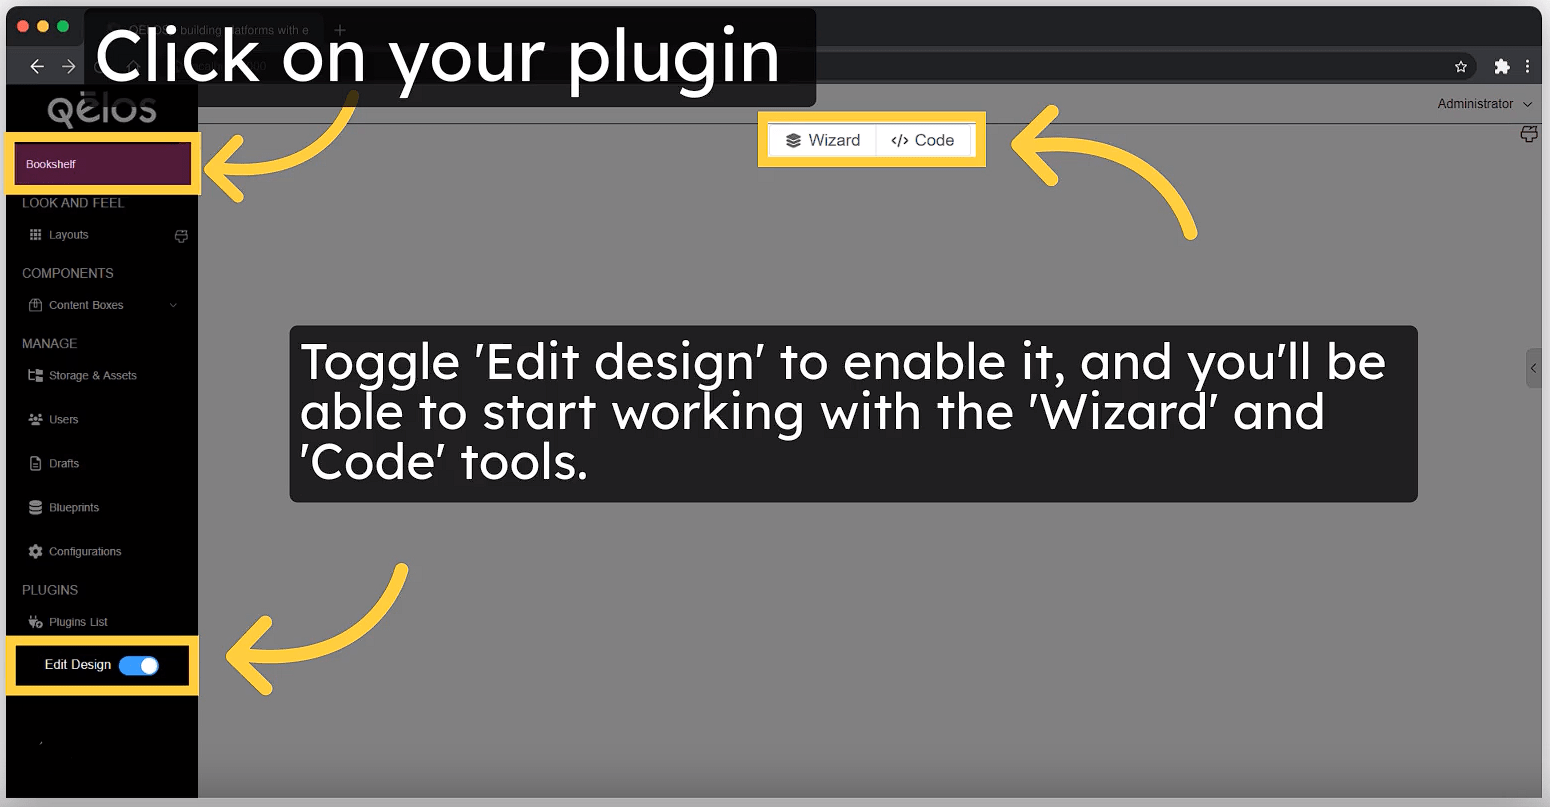
- Go to your plugin page by clicking on it.
- Enable the Edit Design feature to access the Plugin Page tools: Wizard and Code Tool.
Wizard Tool Interface
To start using the Wizard Tool, click on the icon.
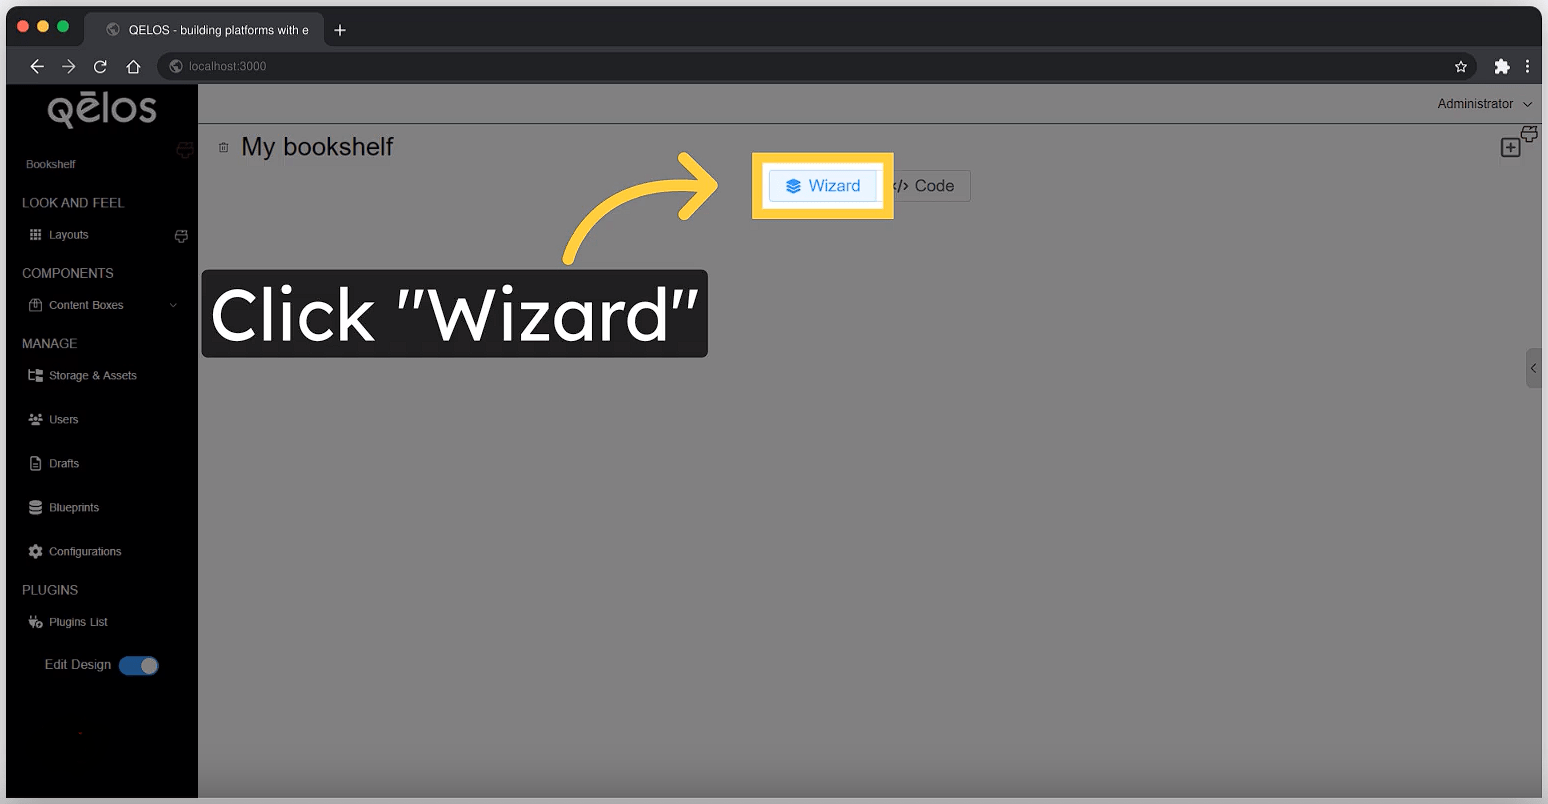
Here you can see the Wizard Tool interface.
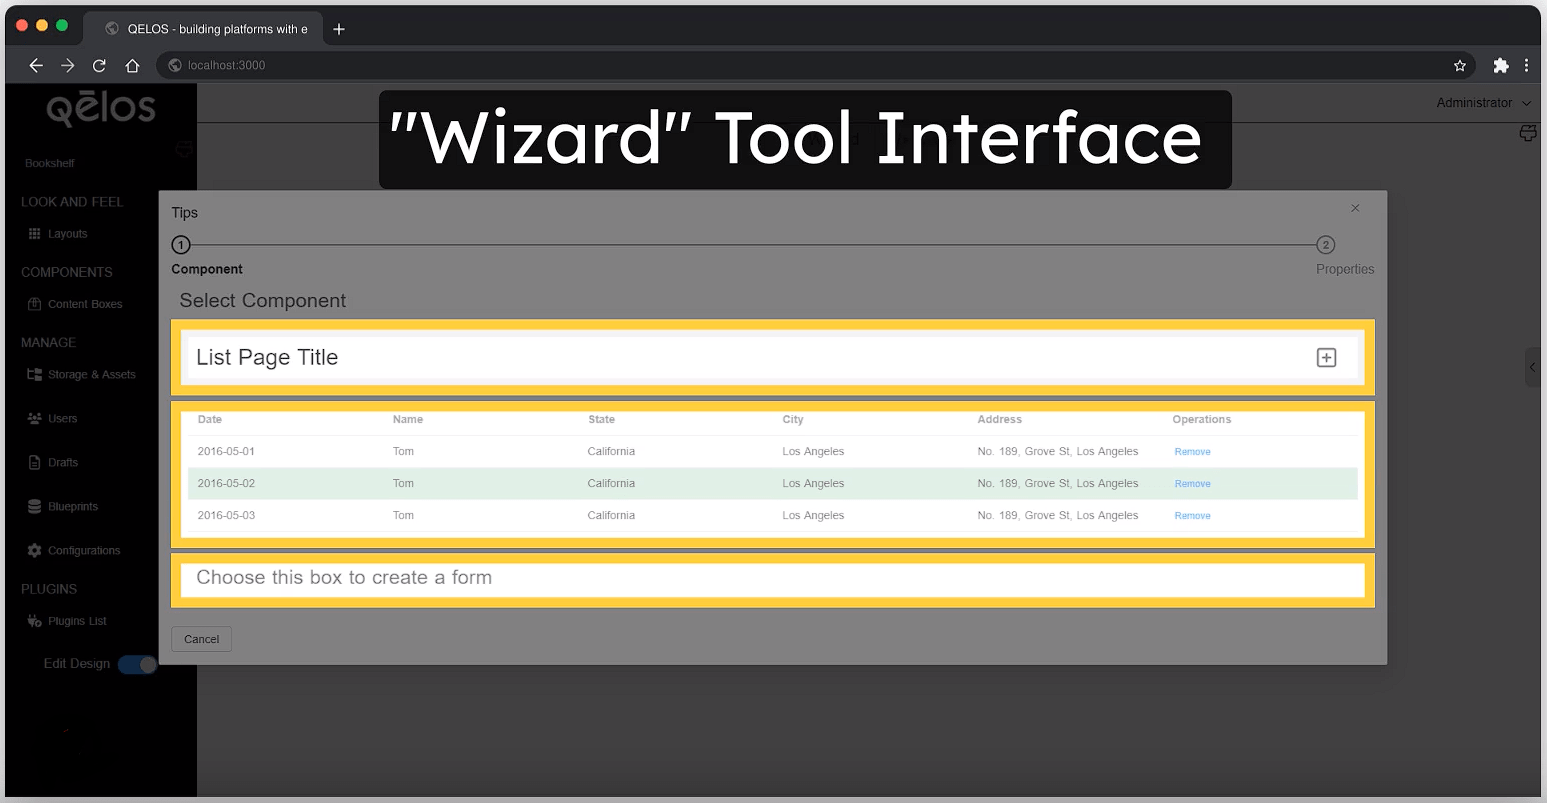
Here you can see 3 section:
1. List Page Title Tool Section
The List Page Title Tool allows you to add a Title and a Path to Create New Item. This section is crucial for defining how users will navigate to the page where new items can be created.
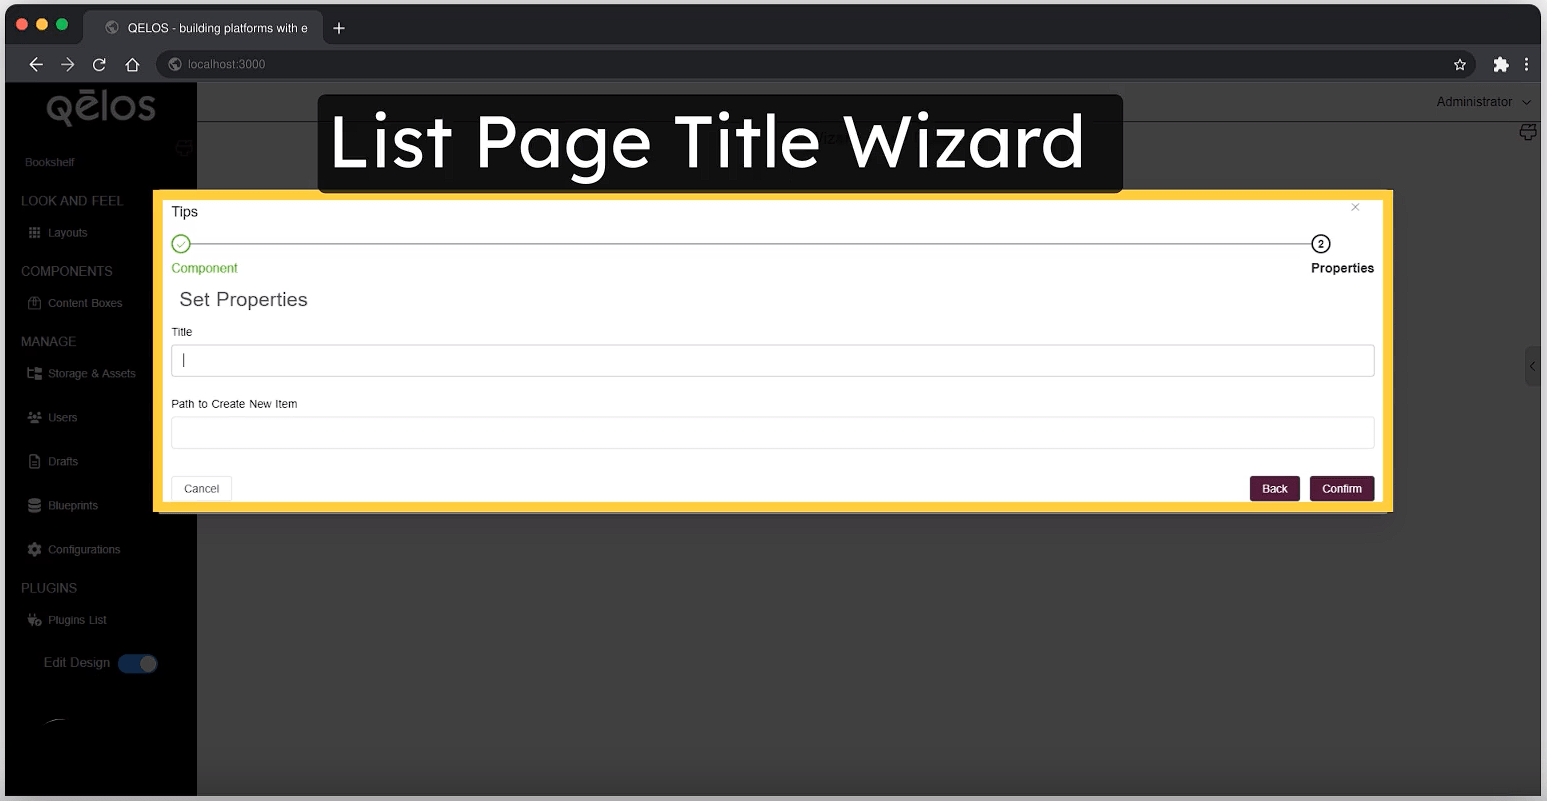
Set Properties
Title: Enter the title to be displayed on the list page, which serves as the main header for users.
Path to Create New Item (Optional): Define the relative URL path where users can create new items. This path should start with a forward slash (
/) to ensure correct navigation.- Relative URL: Ensure that the path is a relative URL. For example, if your creation page is located at
/way1, input/way1as the path. - Customizable Paths: If you've created separate pages—one for the list and one for the new item creation—you can link the creation page here. This will enable a plus icon next to the title, providing a shortcut to the creation page.
- First Slash Requirement: It's essential to include a forward slash (
/) at the beginning of the path to ensure correct navigation.
Note: The Path to Create New Item field is optional. You can choose to use it or leave it blank, depending on your needs.
- Relative URL: Ensure that the path is a relative URL. For example, if your creation page is located at
After setting up the List Page Title, the changes will be reflected on the plugin page.
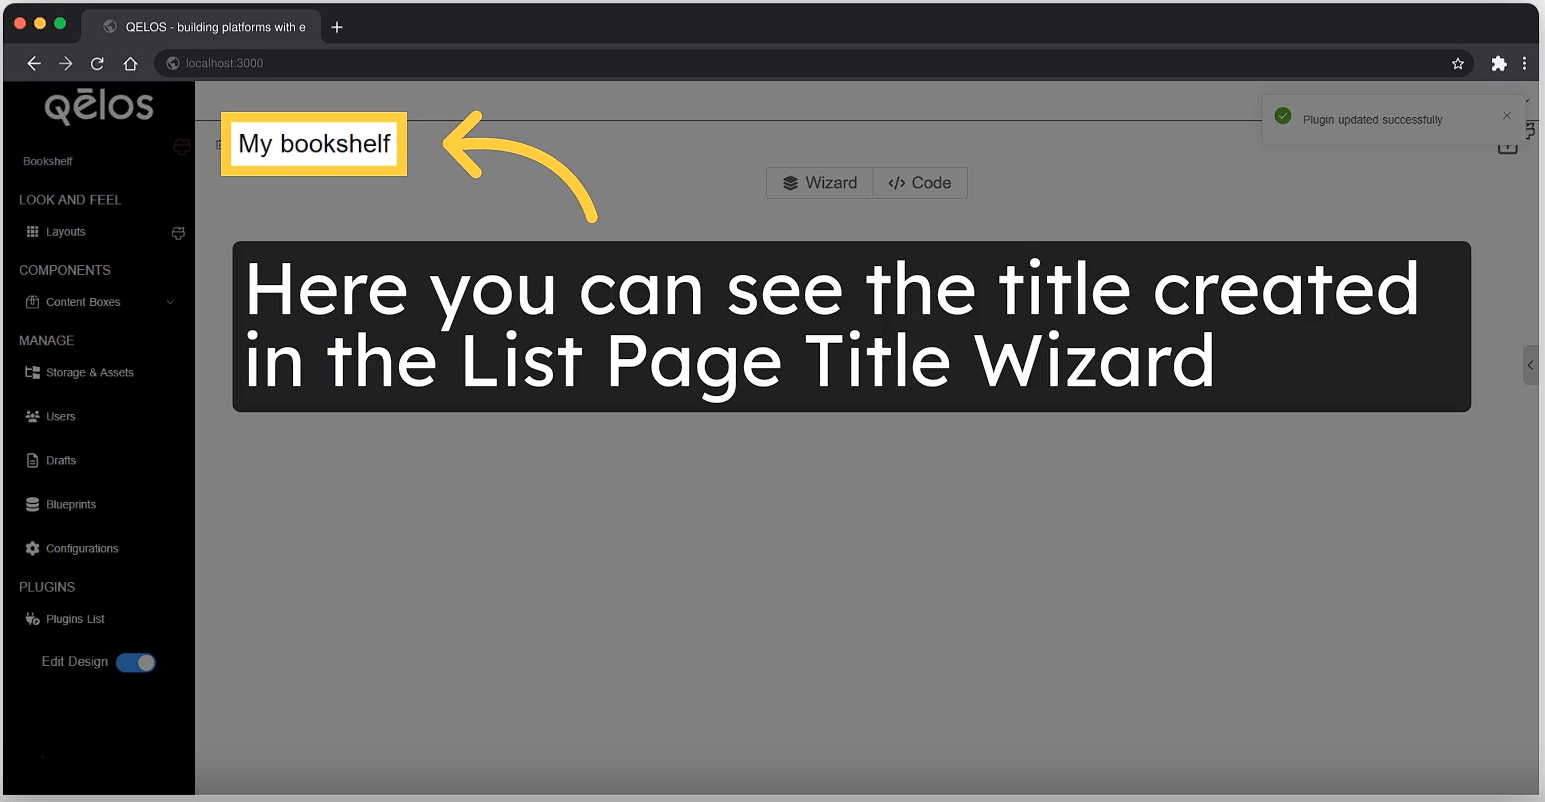
2. Table Builder Tool Section
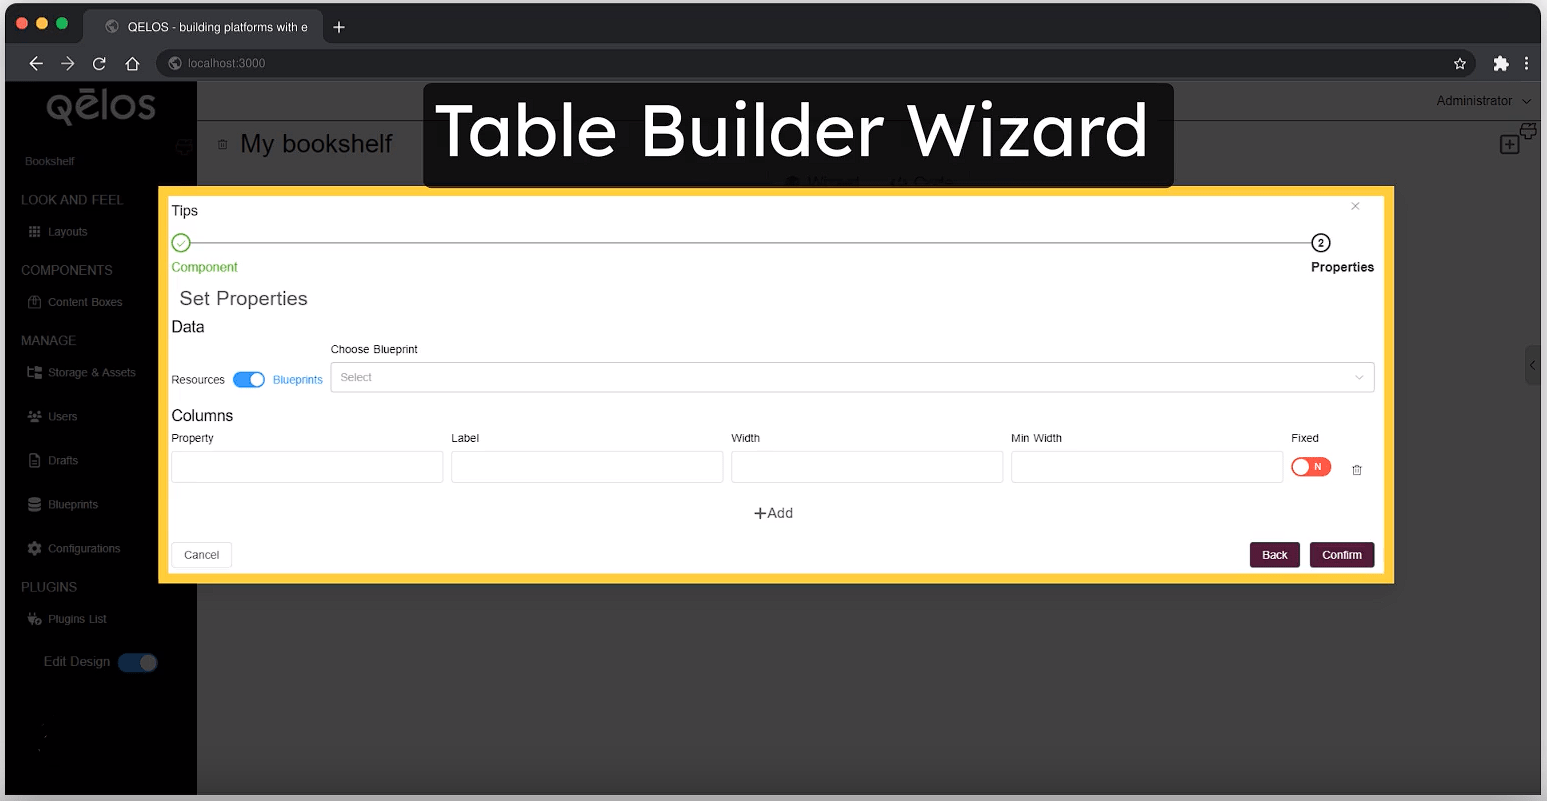
The Table Builder Tool allows you to define and display data in a structured table format on your plugin page.
Data
For the Data section, you can choose to use Blueprints. Select a blueprint from the list of previously created blueprints. This will determine the structure and properties of the data displayed in the table.
- Example: If you select the Book blueprint, the table will be configured based on the properties defined in the Book schema.
Columns
In the Columns section, the table will automatically populate with columns based on the selected blueprint:
Property: The table will auto-fill columns with properties defined in the blueprint. For instance, if the blueprint includes
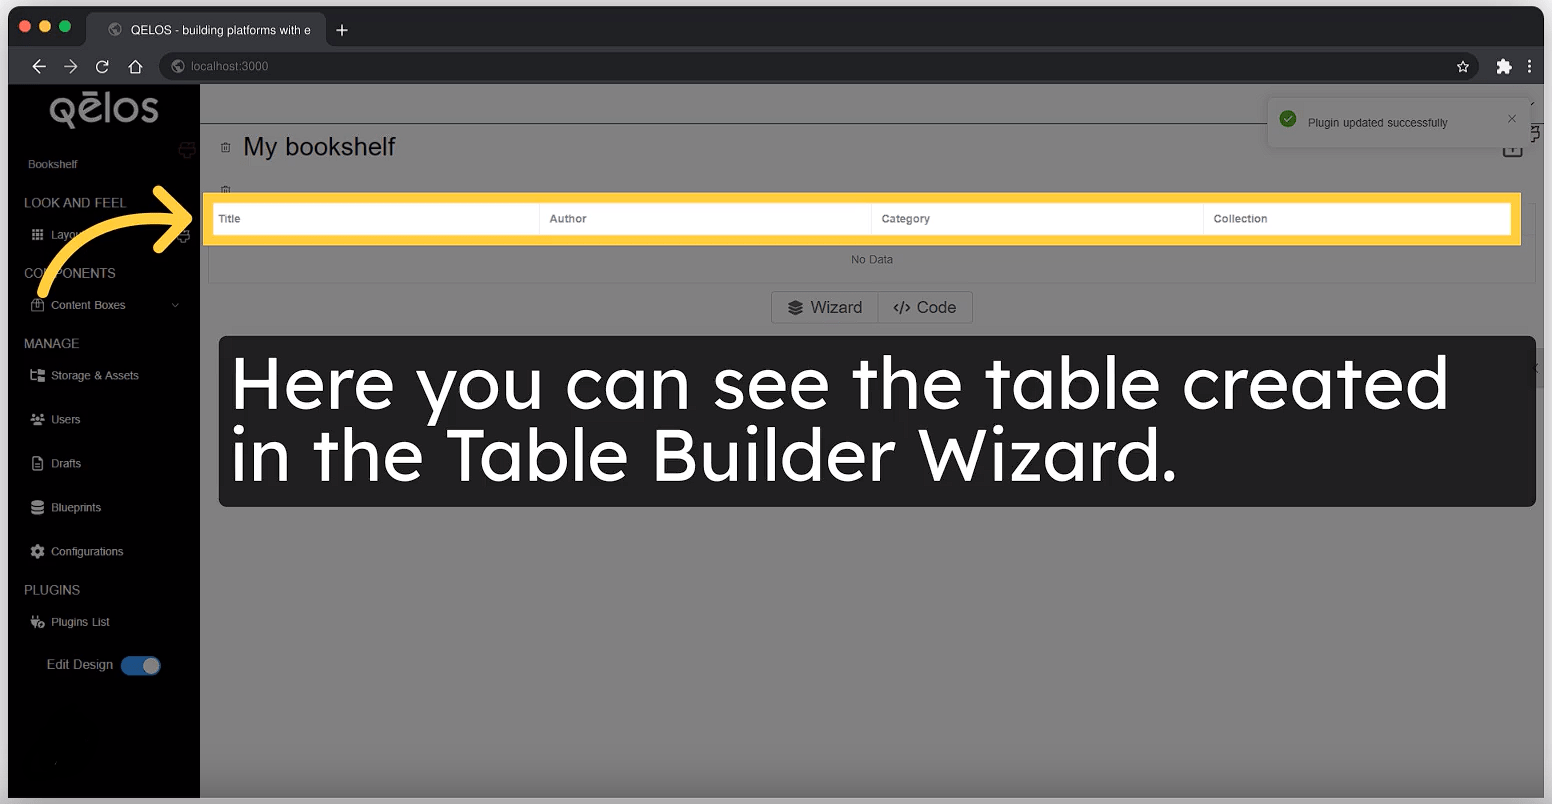
metadata.title, this property will automatically create a column in the table.Label: Each property will have a corresponding label, such as:
Property: metadata.title->Label: TitleProperty: metadata.author^Label: AuthorProperty: metadata.category->Label: CategoryAnd so forth, based on the blueprint schema.
Additionally, you can manually adjust the following settings:
- Width: Specify the width of each column.
- Min Width: Set the minimum width for each column to ensure proper display.
After configuring the Table Builder, the changes will be visible on the plugin page.
3. Form Builder Tool Section
To start configuring forms, click on the Form Builder Tool. You'll need to select the option Choose this box to create a form to begin.
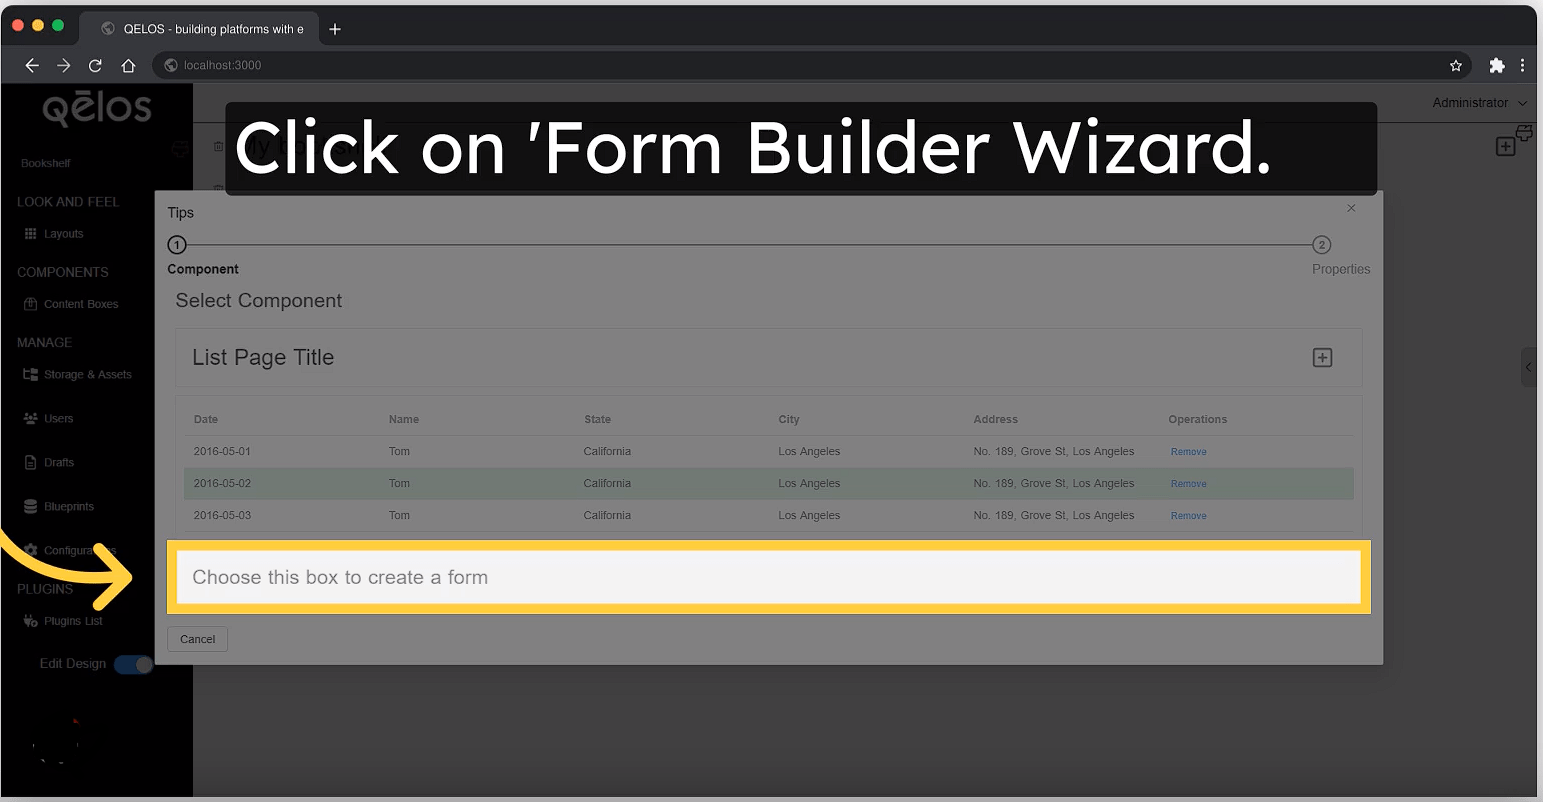
Form Builder Tool Interface
In the Form Builder Tool interface, you will find several fields that need to be configured:
On Submit (Function to call when form is submitted): This is where you define the function that will be executed when the form is submitted. For example, if you're working with a book blueprint, you might use the following function:
bash(form) => sdk.blueprints.entitiesOf('book').create(form)Data (Data to be used in the form): Here, you will specify the data to be used within the form. For example, you might enter
"MyBook"as the data identifier.- It should be a property name without spaces.
- Use camelCase or PascalCase as appropriate. For instance,
MyBookis a valid name. - Avoid using lowercase or spaces to prevent any issues in form handling.
Success Message: Define the message that will be displayed upon successful form submission.
Error Message: Define the message that will be displayed if an error occurs during form submission.
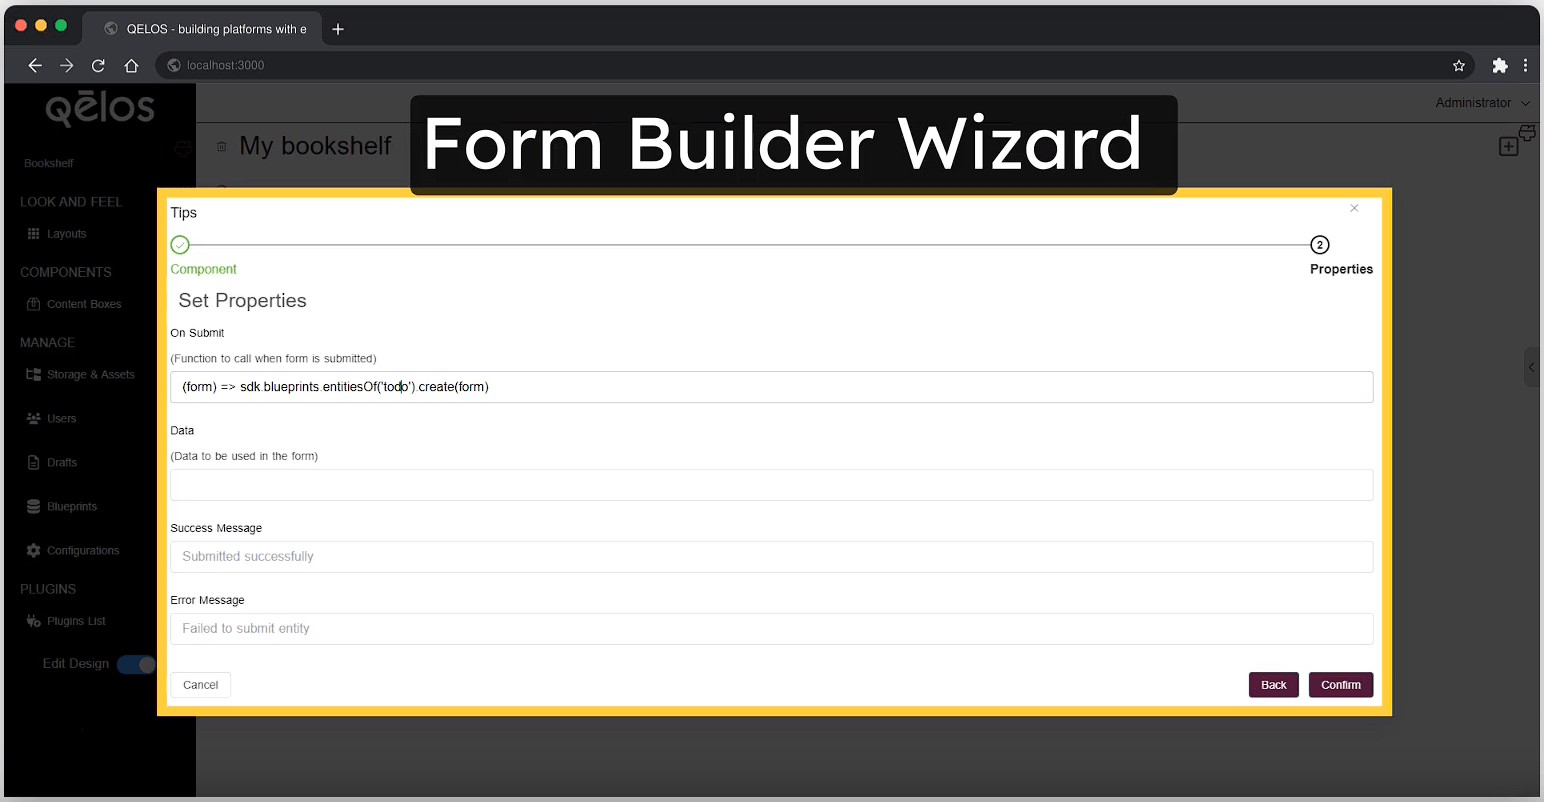
Code Tool Interface
To begin working with the Code Tool, simply click on its icon.
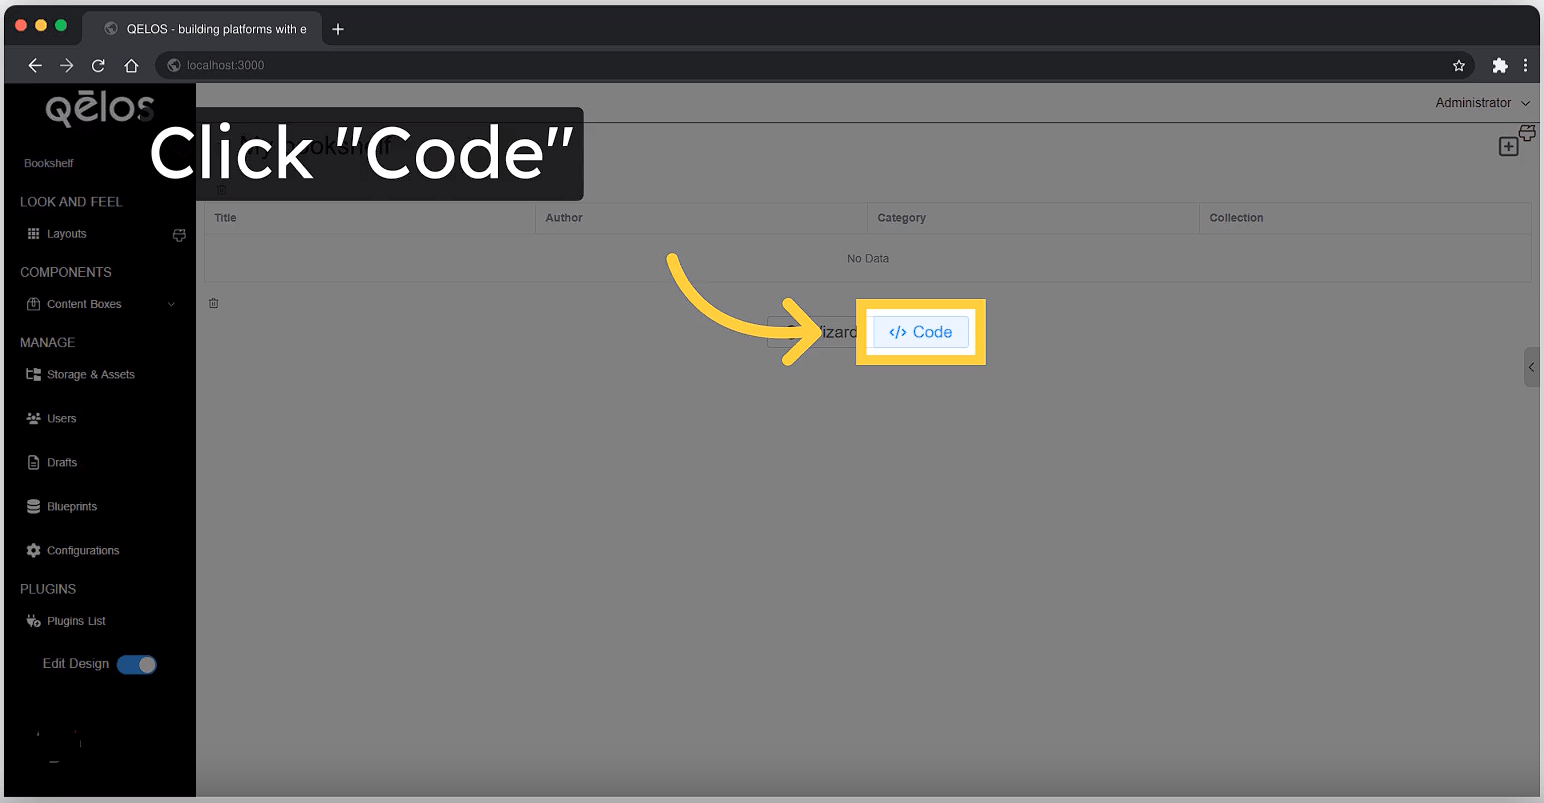
The Code Tool Interface is divided into two main sections:
- HTML Tool Section
- Requirements Tool Section Each section serves a distinct purpose in the configuration and customization of your plugin page.
1. HTML Tool Section
Inside the HTML Tool section, you can use the <general-form> component to create forms that interact with your blueprint data. The <general-form> component binds a form object to the form elements within it, allowing you to create, edit, or display blueprint data in a structured format.
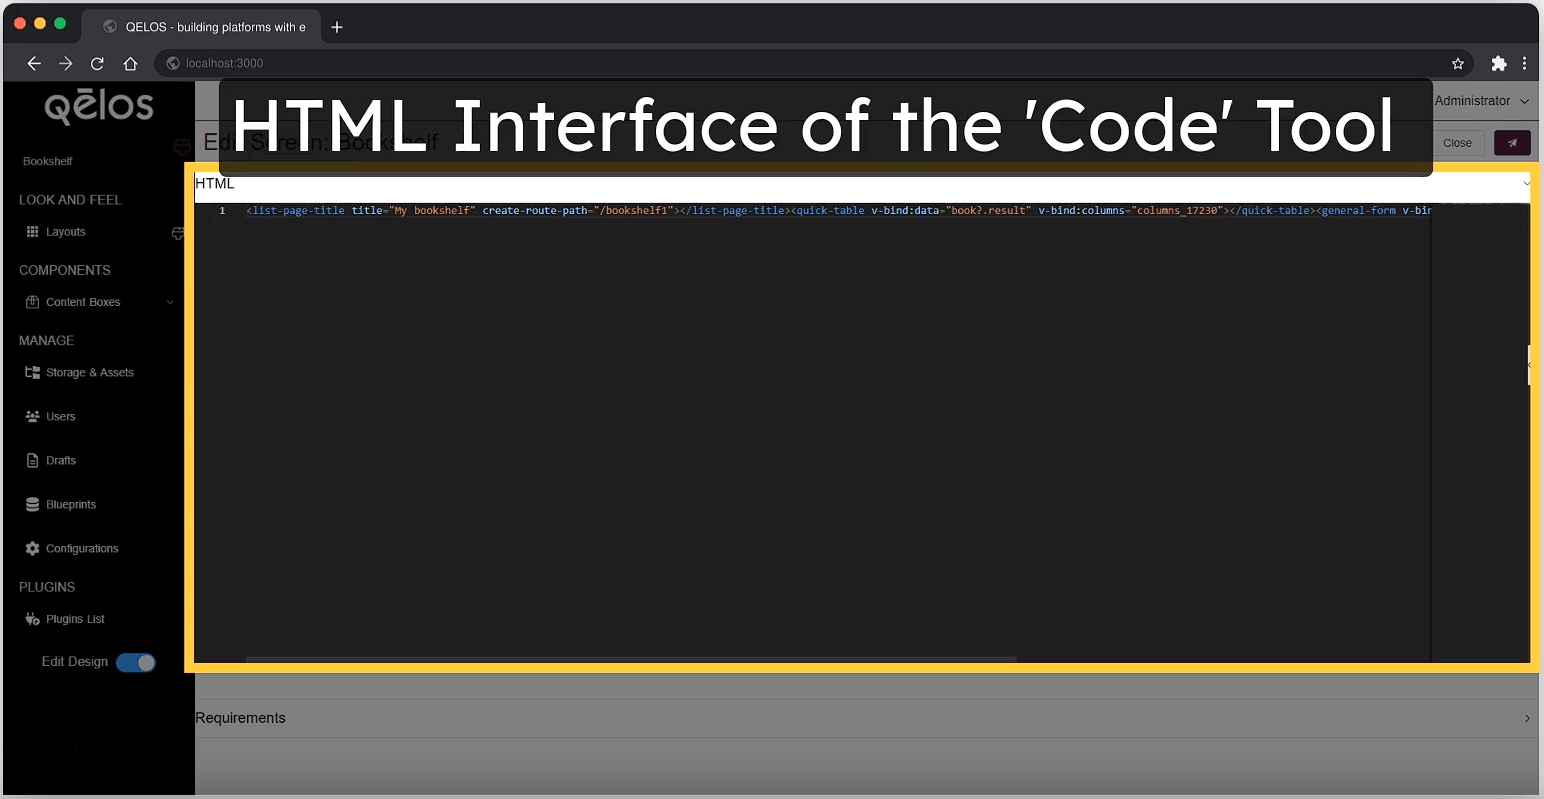
Example Usage of <general-form>
<general-form v-bind:on-submit="(form) => sdk.blueprints.entitiesOf('app').create(form)">
  <template>
    <!-- This template defines the form structure -->
    <template #default="{ form }">
      <!-- EditHeader allows adding a header to the form section -->
      <EditHeader>Here we can add title</EditHeader>
      <!-- FormInput binds the input field to form.metadata.title -->
      <FormInput title="Title" v-model="form.metadata.title"></FormInput>
    </template>
  </template>
</general-form>
Explanation:
<general-form>Component:
v-bind:on-submit: This attribute binds a submit function to the form. In this example, the function creates a new entity within the blueprint specified (app).- The
formobject represents a temporary clone of the data, allowing for modifications without affecting the original data until the form is submitted.
- Template Structure:
<template #default="{ form }">: : This template section is where the form fields are defined. Theformobject is passed as a parameter, enabling data binding.
- Form Elements:
<EditHeader>: This component is used to add a header or title to the form section. <FormInput>: This component creates an input field for the form. The title attribute specifies the label for the input field, and the v-model directive binds the input field to the form.metadata.title property. This binding ensures that any changes made in the input field are reflected in the form object.
Notes:
- The property in the
v-modelcan vary depending on how the data is structured in your JSON blueprint. For example,form.metadata.titlemight be simplyform.titleif the title is a direct property of theformobject rather than nested withinmetadata. - This setup allows for flexible form creation, with each input field linked to specific properties within the blueprint data, ensuring that user input is captured correctly.
2. Requirements Tool Section
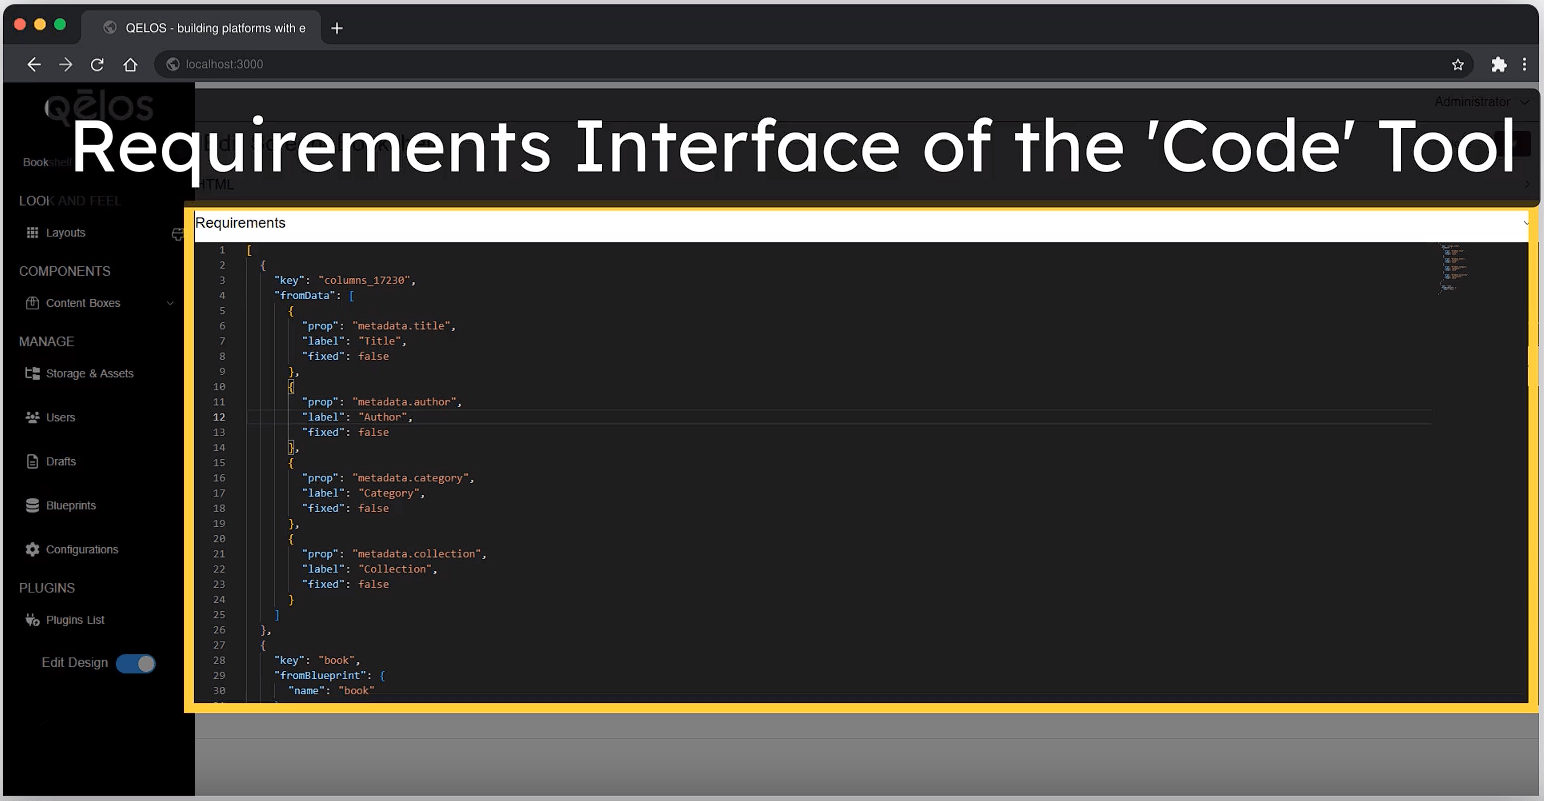
The Requirements Tool Section in the Code Tool Interface allows you to define the necessary data structures, blueprints, and initial values for your plugin. This section is essential for setting up how data is loaded and used within the form or table on your plugin page.
How to Use the Requirements Tool
Key: Each object or data source you define is given a unique
key. This key is used to reference the data or configuration throughout the plugin.fromData: This allows you to define custom data directly within the tool. You can use it to set initial values or to provide static data.
fromBlueprint: This loads a data structure or schema that has been predefined as a blueprint. For example, if you have a blueprint for a "Book", you can load it here, and all the relevant fields will be available for use.
Example Code
Below is a sample code block that shows how to configure the Requirements Tool. This example sets up a table with columns for a book's metadata, loads a blueprint, and defines initial data for a book object.
[
  {
    "key": "columns_17229",
    "fromData": [
      {
        "prop": "metadata.title",
        "label": "Title",
        "fixed": false
      },
      {
        "prop": "metadata.author",
        "label": "Author",
        "fixed": false
      },
      {
        "prop": "metadata.category",
        "label": "Category",
        "fixed": false
      }
    ]
  },
  {
    "key": "book",
    "fromBlueprint": {
      "name": "book"
    }
  },
  {
    "key": "MyBook",
    "fromData": {
      "title": "my title",
      "author": "my author",
      "category": "my category"
    }
  }
]
Explanation of the Code:
- Columns Definition:
{
  "key": "columns_17229",  // Unique identifier for the column set
  "fromData": [
    {
      "prop": "metadata.title",  // Property name from the data
      "label": "Title",           // Display label for the column
      "fixed": false              // Whether the column is fixed in place
    },
    {
      "prop": "metadata.author",
      "label": "Author",
      "fixed": false
    },
    {
      "prop": "metadata.category",
      "label": "Category",
      "fixed": false
    }
  ]
}
Purpose: This section defines the columns for a table. Each column is tied to a property, and has a label that will be displayed in the table. The fixed option determines whether the column is fixed in place.
Properties:
prop: The property from the data that populates this column (e.g., metadata.title). label: The display name for the column. fixed: A boolean value to determine if the column is fixed.
- Blueprint Definition:
{
 "key": "book",
 "fromBlueprint": {
   "name": "book"
 }
}- Purpose: This section loads a blueprint named
"book". Blueprints are predefined data schemas that can be reused. - Key:
"book"is the unique identifier for this blueprint in the requirements section.
- Initial Data for
MyBook:
{
  "key": "MyBook",  // Unique identifier for this data object
  "fromData": {     // Initial data values for the object
    "title": "my title",       // Predefined title for the book
    "author": "my author",     // Predefined author name
    "category": "my category"  // Predefined category
  }
}- Purpose: This section defines initial data for a new book object. It can be used to prepopulate form fields or provide default values.
- Key: "MyBook" serves as a unique identifier for this data set within the requirements.
- fromData: This is where you specify the initial values for the object's properties.
Extending the Example
If you need to add more objects or modify the existing configuration, you can insert additional entries following the same pattern. For example, if you want to add another object, you would do so like this:
{
  "key": "AnotherObject",
  "fromData": {
    "property1": "value1",
    "property2": "value2"
  }
}
Simply insert this new object within the JSON array, and it will be included in the plugin's requirements.
Options for Loading Data
You have several options for loading data into your object:
- From Blueprint: Loads blueprint data specific to the object (e.g., books).
- From Resource: Loads data from resources such as users, blocks, or layouts.
- From CRUD: Loads data from a CRUD operation.
- From HTTP: Loads data from any HTTP URL.
